Essential Yoga Poses for BeginnersYour Guide to 13 Basic Yoga Poses: Names and Key Posture Tips
Long hours of sitting, standing, hunching, and looking down at phones can lead to stiff muscles and back pain. To help alleviate this discomfort, Twosevenths has compiled 13 basic yoga poses you can try at home. These simple, foundational poses are perfect for beginners, so get up and start moving!
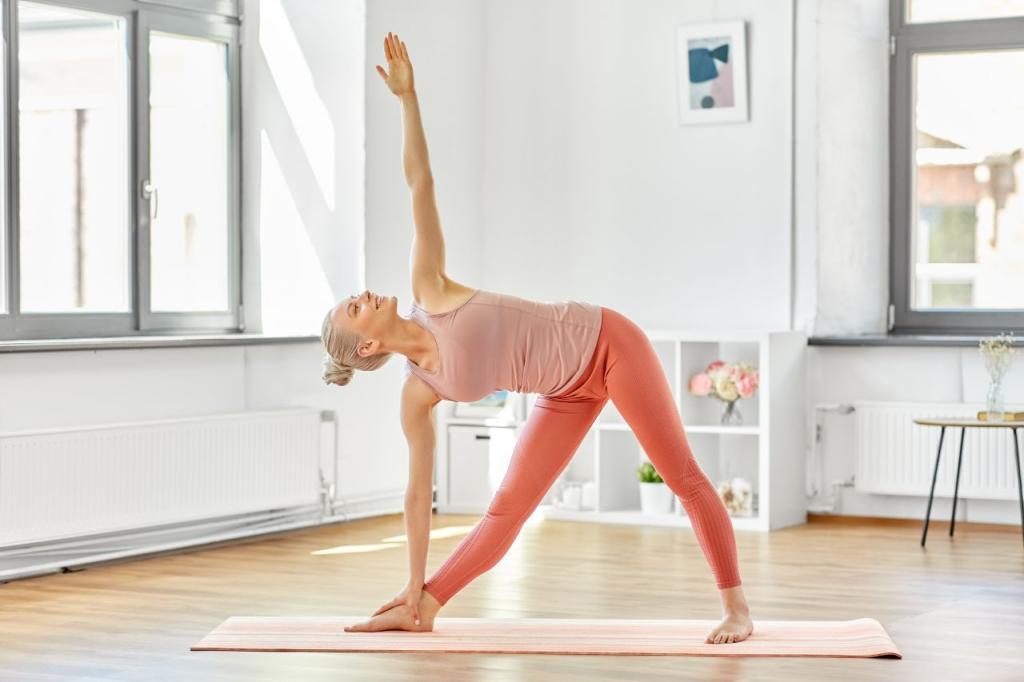
Cat-Cow Pose (Difficulty 1/5)
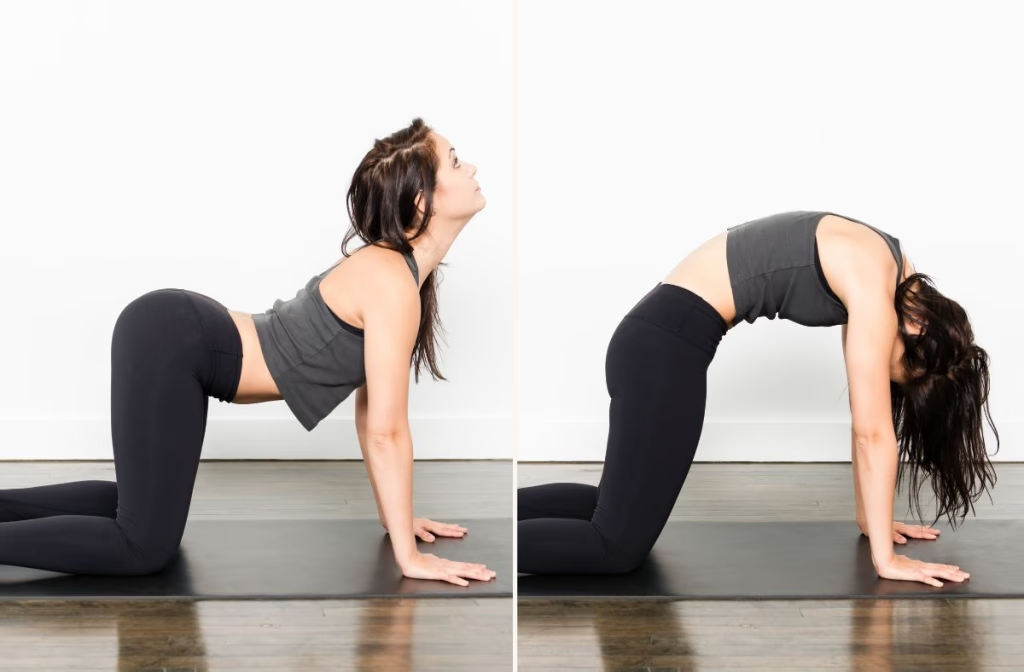
Cat-Cow Benefits:
- Improves spinal flexibility, corrects pelvic alignment, stretches neck and back, regulates breathing, releases stress
Cat-Cow Pose:
- Start on all fours, hands directly under shoulders, knees hip-width apart, toes tucked.
- Begin with "Cow Pose": Inhale slowly, dropping your navel towards the floor, tilting your pelvis forward to create an arch in your lower back. Gaze upwards, stretching your spine.
- Transition to "Cat Pose": Exhale, imagining your navel being gently lifted upwards. Tilt your pelvis backward, press firmly into your hands, and round your back, gazing towards your navel.
- Repeat Cat and Cow poses 5-10 times.
✦Cat-Cow Pose: Things to Note
- This basic yoga pose is perfect for beginners with stiff bodies. Practicing Cat-Cow can increase mobility in the spine and pelvis.
- Beginners should focus on the rhythm of breath and movement, keeping breathing smooth and finding a neutral spine position. Perform the entire sequence slowly.
- Pay special attention: when performing Cow Pose, avoid "bending at the waist." Instead, allow your lower back to naturally sink by "rotating your pelvis." The same applies to Cat Pose: lift your abdomen upwards by rotating your pelvis and engaging your core.
✦Cat-Cow Pose Tutorial
Standing Forward Fold (Difficulty 2/5)
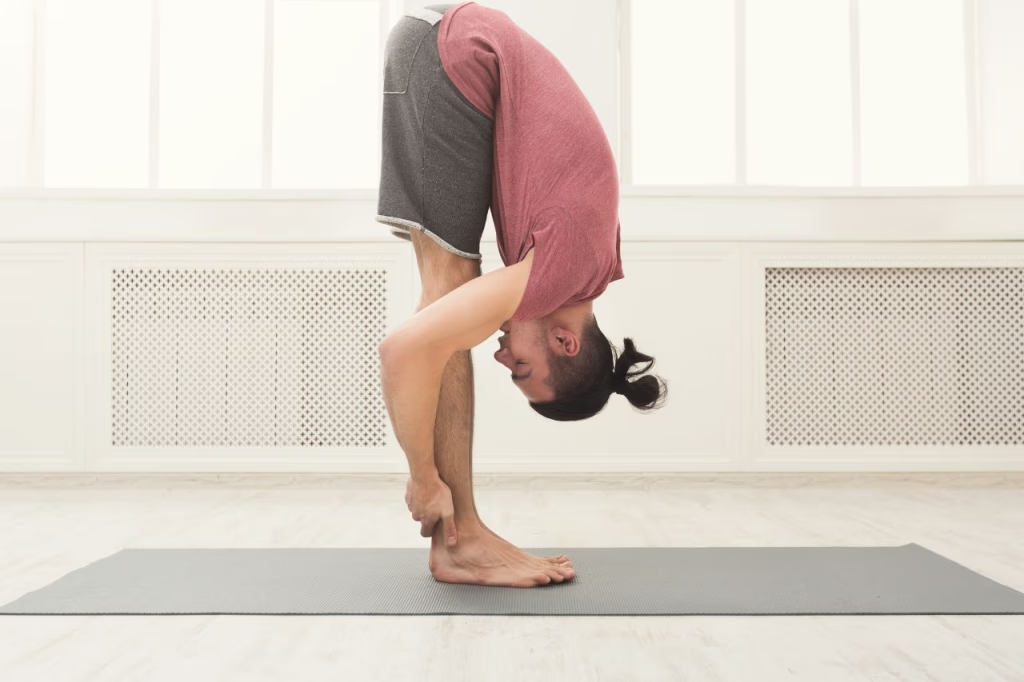
Standing Forward Fold Benefits:
- Relaxes the back, stretches the legs, regulates breathing
Standing Forward Fold Steps:
- Stand with feet together, chest lifted, inhale, and raise your joined hands overhead.
- Inhale again, imagining a string pulling from the crown of your head, lengthening your spine.
- Exhale as you fold forward from your hips, imagining your abdomen pressing towards your thighs. Relax your shoulders and neck, letting your head hang naturally.
- Hold for 5-10 breaths. With each inhale, imagine your spine extending; with each exhale, allow your body to relax deeper into the fold.
- To rise, slightly bend your knees, engage your core, and slowly roll your spine up to a standing position on an inhale, lifting your head last.
✦Standing Forward Bend: What to Know
- Avoid arching your back: When folding forward, hinge from your hips, not your waist, to reduce pressure on your lumbar spine.
- Slightly bend your knees: If your hamstrings are tight, don't force it. A slight bend in the knees allows your upper body to relax more.
- Avoid overstretching: There's no need to force yourself to touch the ground. The goal is a comfortable stretch, not extreme extension.
- Practice advanced versions: As your flexibility improves, try holding your ankles or pressing your palms to the ground to deepen the stretch.
✦Standing Forward Bend Tutorial Video
Cobra Pose (Difficulty 3/5)
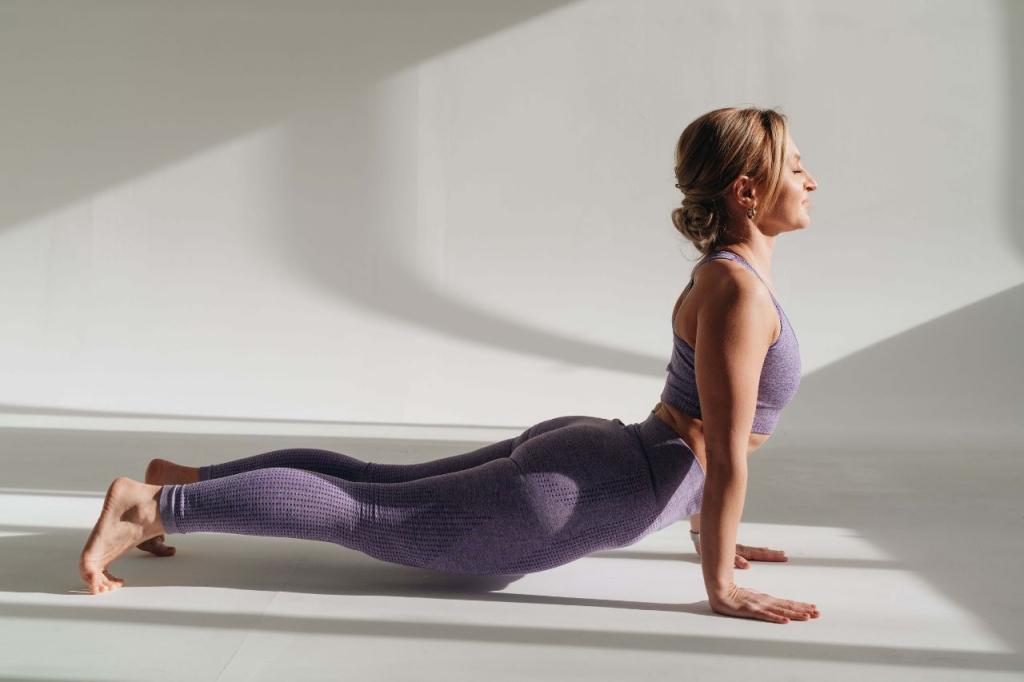
Cobra Pose Benefits:
- Opens the chest, strengthens the back, promotes blood circulation, and improves posture.
Cobra Pose Steps:
- From a standing forward bend, place your hands on the floor, extend your right and left legs back into a plank position.
- Lower your knees to the ground (advanced practitioners may skip this step), then shift your body forward as far as comfortable.
- Bend your elbows, lowering your body as if doing a push-up. Then, press firmly into the floor with your palms, lift your chest, and slightly raise your chin. The tops of your feet can rest on the floor.
- Exhale, gaze upwards, and tilt your head back to open your breathing passages. Keep your core engaged and your back muscles tight. Hold for 3-5 breaths.
✦Cobra Pose Precautions
- This basic yoga pose focuses on opening the thoracic spine and the entire front of the body, with the spine extending towards the sky, not forward.
- The most common mistake for beginners is shrugging their shoulders. If you find yourself shrugging, first relax your shoulders, then press your palms firmly into the ground to lift your upper body. This usually helps correct the posture.
✦Cobra Pose Tutorial Video
Downward-Facing Dog (Difficulty 2/5)
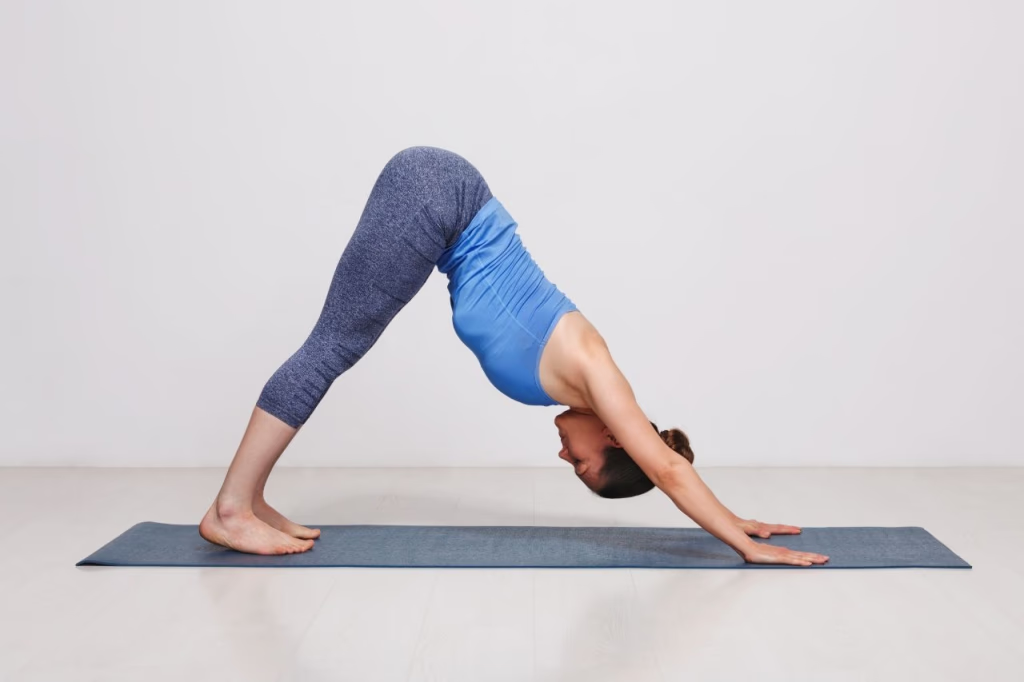
Downward-Facing Dog: Benefits
- Stretches the spine, relieves lower back pain, and lengthens the calves.
Downward-Facing Dog: How to Perform
- From the end of Cobra Pose, shift your hips back towards your heels (advanced practitioners may skip this step). Inhale, engage your core, and lift your hips high.
- Alternatively, you can start from Child's Pose to more easily find the correct distance. From Child's Pose, with knees on the ground, shift your hips back towards your heels (advanced practitioners may skip this step). Inhale, engage your core, and lift your hips high.
- As you exhale, firmly plant your feet on the ground, engage your thighs, but relax your shoulders. Extend your arms, forming an inverted V-shape with your body.
- Hold for 5-10 breaths. With each inhale, feel your spine lengthen, and with each exhale, allow your body to relax further.
- To finish, return to an all-fours position or Child's Pose.
✦Downward-Facing Dog: What to Know
- When you first try this basic yoga pose, it's okay if your heels don't touch the ground. You can repeatedly lift and lower each foot to relax the back of your calves.
- Spread your palms as wide as possible, splay your fingers, and press your palms firmly into the ground to avoid putting too much pressure on your wrists. Keep your elbows slightly bent to prevent locking them.
- Keep your shoulders away from your ears; do not shrug. Instead, let your shoulder blades sink down and keep your neck relaxed.
✦Downward-Facing Dog Tutorial Video
Low Lunge (Difficulty 2/5)
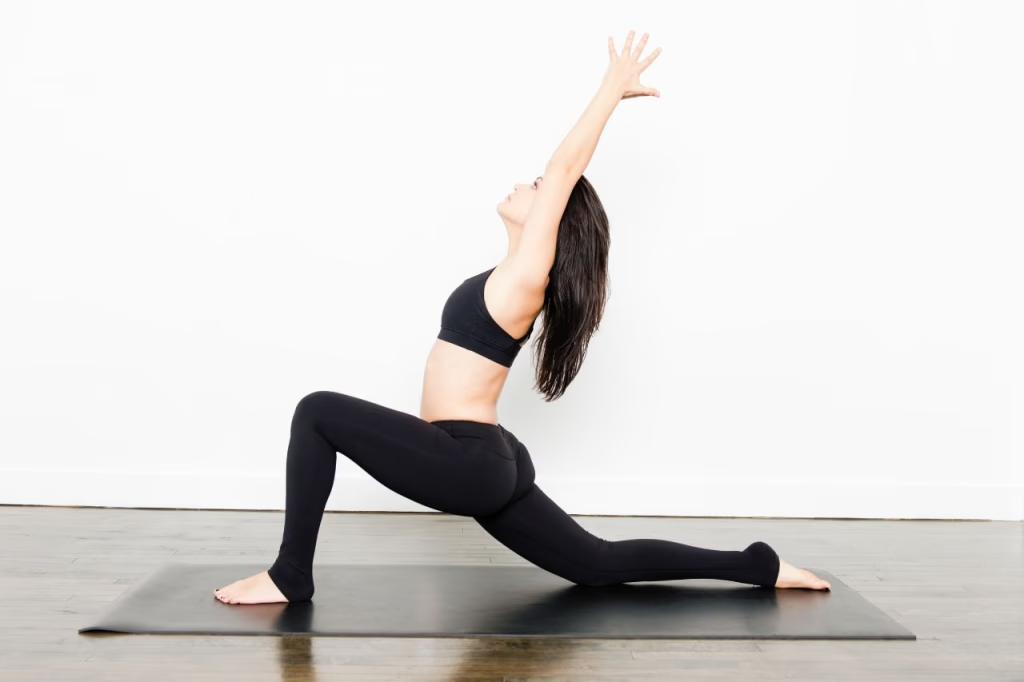
Low Lunge Benefits:
- Stretches hips and quadriceps, stabilizes the pelvis, relieves lower back pressure, and improves hip stiffness from prolonged sitting.
Low Lunge Steps:
- Starting position: Begin in a standing position. As you inhale, step your right foot back into a large stride, keeping your left knee bent. Gently lower your right knee to the floor, with the top of your foot flat on the mat.
- Adjust your posture: Ensure your left foot is firmly planted, with your left knee directly above your ankle. You can place your hands on your left knee for stability.
- Inhale: Raise your arms overhead, extending your spine. Engage your core, gently tuck your tailbone, and stabilize your hips to avoid compressing your lumbar spine.
- Exhale: Gently sink forward into the pose, feeling the stretch in your hips and the front of your thighs. Keep your chest open, and your gaze forward or slightly upward.
- Hold for 5-10 breaths. With each inhale, lengthen your spine; with each exhale, deepen into the pose and relax.
Switch sides: On an inhale, slowly come out of the pose and return to standing before practicing on the other side.
✦Low Lunge: Key Points
- Hips down, but not compressed: The focus of this basic yoga pose is to stretch the hips and front of the legs, not to over-compress the knees by pushing too far forward.
- Knees aligned with ankles: Avoid letting the front knee extend past the toes, which can put extra strain on the knee joint.
- Core engaged, tailbone tucked: Keep your core stable to prevent over-compression or collapse of the lumbar spine.
- Shoulders relaxed: When raising your arms, avoid shrugging your shoulders. Let them naturally drop, keeping your neck relaxed.
- Use yoga blocks for support: If your hips are tight, place yoga blocks on either side of your leg and rest your hands on them for support. This reduces pressure and increases stability.
✦Low Lunge Pose Tutorial Video
Triangle Pose (Difficulty 3/5)
Triangle Pose Benefits:
- Opens the hips, strengthens the legs, lengthens the spine and side waist, improves balance and posture
Triangle Pose Steps:
- Starting position: Stand with feet about one leg-length apart. Point your right foot forward and turn your left foot slightly inward by about 15 degrees.
- Align your pelvis: Extend both arms out to the sides at shoulder height, palms facing down. Engage your core, feeling stable.
- Inhale: Lengthen your spine upward, preparing to stretch to the right.
- Exhale: Lean your upper body to the right. Place your right hand down on your shin, ankle, or — if your flexibility allows — on the floor. (Adjust according to your personal flexibility.) Extend your left hand upward. You can look up at your left fingertips, or if your neck is uncomfortable, look straight ahead.
- Hold for 5-10 breaths, feeling the stretch in your legs, side waist, and spine.
- Return to the starting position after completing your breaths, then switch sides.
✦Triangle Pose Tips
- Keep your legs stable and strong: It's okay if your legs aren't completely straight, but avoid putting pressure on your knees.
- Press your feet evenly into the ground to prevent your body from tilting or losing balance.
- Engage your core to protect your lower back: Sinking too deep can strain your lower back, so keep your core active to support your body.
- Don't force your hands to the floor: If your flexibility isn't there yet, rest your hands on your shins, a yoga block, or your ankles. The key is to maintain spinal length.
✦Triangle Pose Tutorial
Side Angle Pose (Difficulty 2/5)
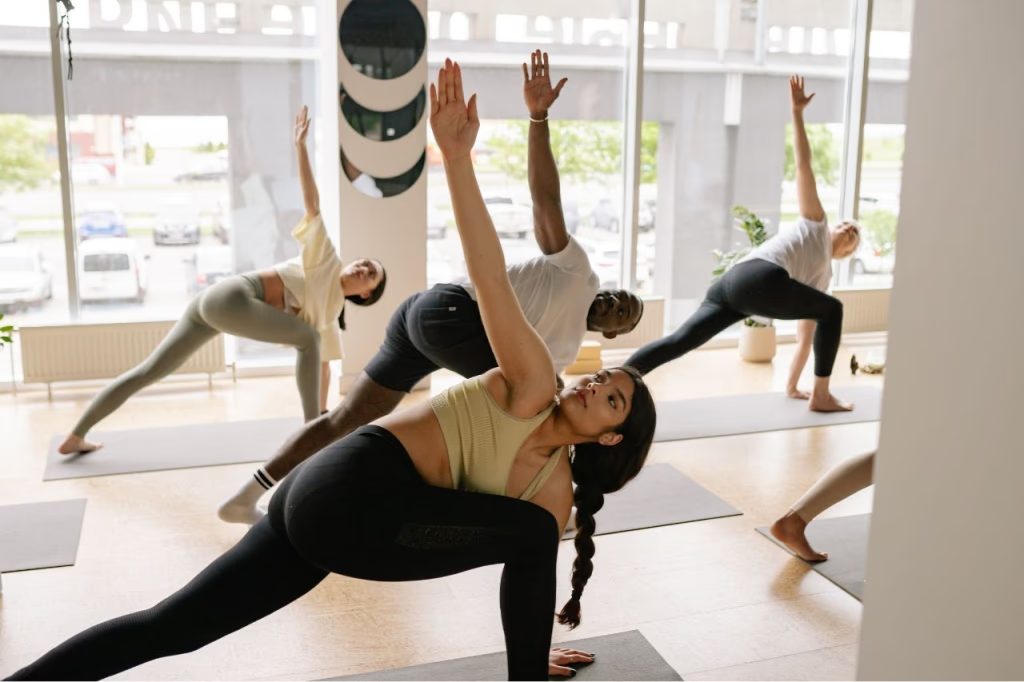
Extended Side Angle Pose (Parsvakonasana) Benefits:
- Strengthens legs and core, stretches side waist and hips, improves body stability.
Extended Side Angle Pose (Parsvakonasana) Steps:
- Standing Preparation: Stand with feet about one leg-length apart. Point your right foot forward and slightly turn your left foot inward by about 15 degrees.
- Knee Bend: Bend your right knee to 90 degrees, so your thigh is parallel to the floor. Ensure your right knee does not extend past your toes. Keep your left leg straight and stable.
- Inhale: Extend both arms out to the sides, feeling your spine lengthen and core engage.
- Exhale: Lean your upper body to the right. Gently rest your right elbow on your right thigh, or place your right palm on the inside of your foot (depending on your flexibility). Extend your left arm straight up or forward, creating a long line from your left foot to your left fingertips.
- Gaze Options: You can look up at your left fingertips, or if your neck is uncomfortable, look forward or down at the floor.
- Hold for 5-10 breaths, feeling the stretch in your side waist, hips, and legs. Return and Switch Sides: On an inhale, use your core strength to bring your upper body back to a standing position. Repeat the same steps on the other side.
✦Side Angle Pose: Key Points
- Keep your front thigh stable: Your front knee should be aligned with your ankle, not extending past your toes, to avoid excessive pressure on the knee joint.
- Engage your core and obliques: Don't just rest your hand on your thigh; use your core and oblique muscles to stabilize the pose, avoiding over-reliance on arm support.
- Extend your arm and align your body: Your top arm should form a straight line with your body. Imagine a long line extending from your heel to your fingertips, maximizing your body's stretch.
✦Side Angle Pose Tutorial Video
Standing Forward Bend (Difficulty 3/5)
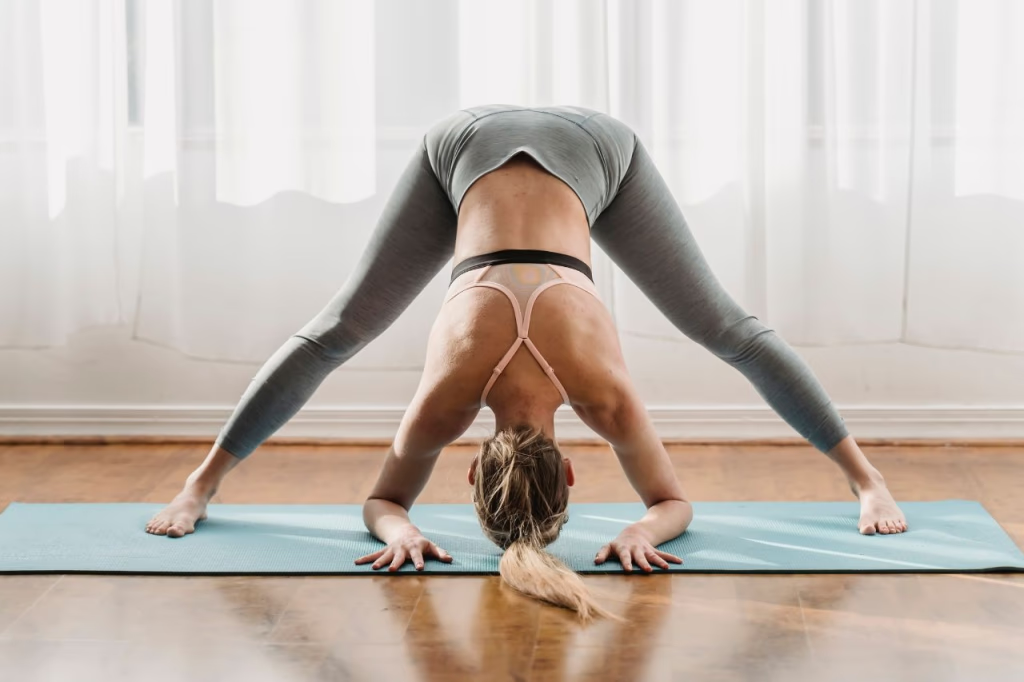
Standing Forward Fold Benefits:
- Stretches the spine, relieves lower back pain, and relaxes the hamstrings (tight hamstrings can also cause back and hip pain).
Standing Forward Fold Steps:
- Starting position: Stand with feet about one leg-length apart, soles evenly grounded, back straight, and core gently engaged.
- Inhale: Raise both hands overhead, extending the spine and feeling your body lengthen upwards.
- Exhale: Fold your upper body forward from the hips, avoiding bending directly from the waist to keep the spine extended.
- Hand placement options: Place your palms on the floor, ankles, or shins, allowing your upper body to hang naturally.
- Hold for 5-10 breaths. With each inhale, feel your spine extend forward; with each exhale, allow your body to relax deeper downwards.
- Return to standing: On an inhale, slightly bend your knees, engage your core, and slowly roll up to a standing position, vertebrae by vertebrae, from the lower back, lifting your head last.
✦Standing Forward Bend: Things to Note
- Avoid arching your back: Bend forward from your hips, not directly from your waist, to reduce pressure on your lumbar spine.
- Slightly bend your knees: If your hamstrings are tight, don't force your knees straight. A slight bend will help your body relax more.
- Avoid overstretching: There's no need to force yourself to touch the ground. The important thing is to feel the stretch in your hamstrings and back, not to reach your maximum extension.
✦Standing Forward Bend Tutorial Video
Twist Pose (Difficulty 1/5)
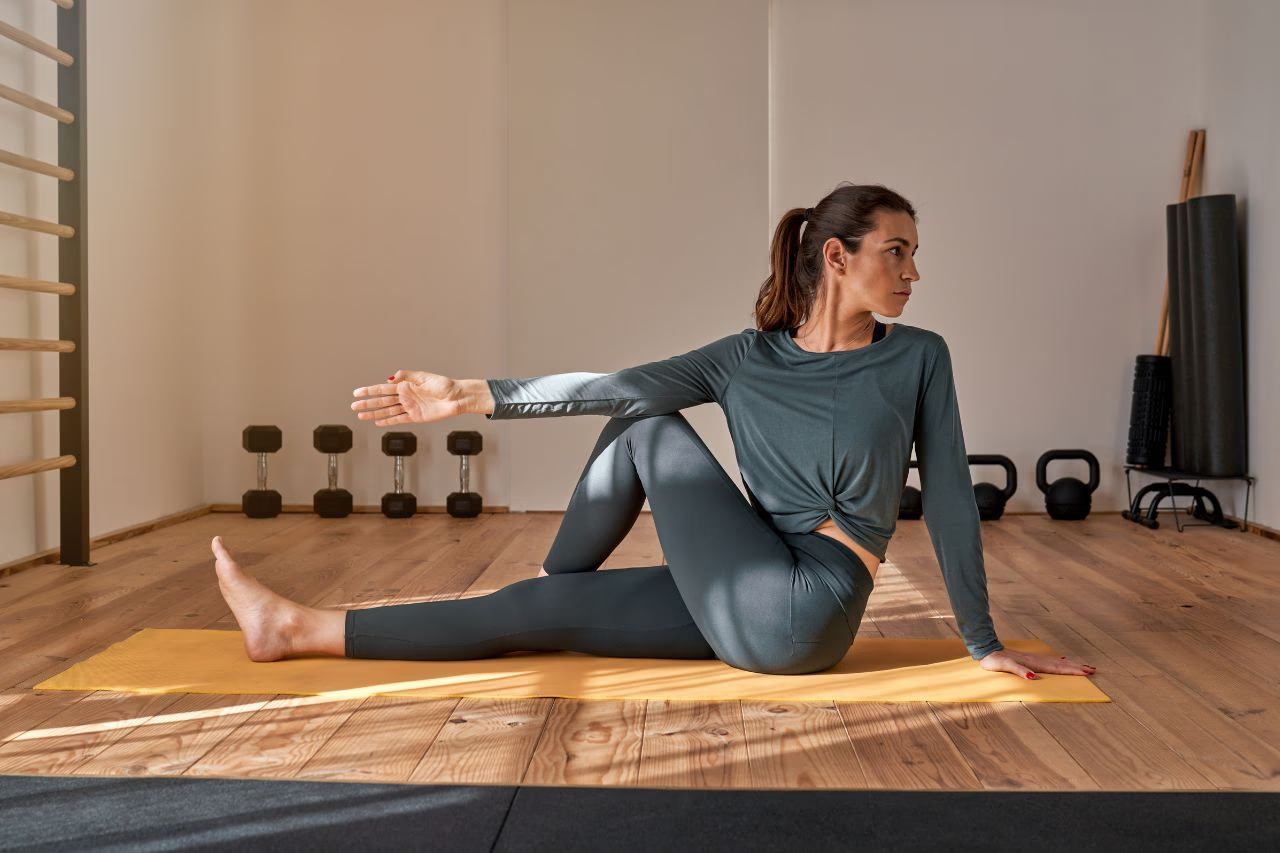
Twisting Seated Pose Benefits:
- Improves spinal flexibility, releases back and shoulder tension, and alleviates lower back pain.
Twisting Seated Pose Steps:
- Prepare in a seated position: Sit on a yoga mat with legs extended forward, spine lengthened, and core gently engaged.
- Bend your right knee: Place your right foot on the outside of your left leg, ensuring your foot is stable on the ground. Your left leg can remain straight, or you can choose to bend your left knee, bringing your foot close to your right hip (this variation is for those with greater flexibility).
- Inhale: Lengthen your spine, gently hold your knees with both hands, and feel your body extending upward.
- Exhale: Twist your body to the right, pressing your left elbow against the outside of your right knee, and placing your right hand behind you for support.
- Choose your gaze: You can look towards your right shoulder or keep your gaze forward (if your neck is uncomfortable).
- Hold for 5-10 breaths, lengthening your spine with each inhale and deepening the twist with each exhale.
- Return to center and switch sides: Slowly return to the center on an inhale, then repeat the same steps on the other side.
✦Twist Posture Precautions
- Lengthen then twist the spine: Avoid hunching or twisting directly. Instead, lengthen your spine upwards before twisting to reduce lower back pressure.
- Engage your core, avoid overexertion: When twisting, use your core muscles to initiate the movement, rather than forcing it with your arms, to prevent back strain.
- Keep your pelvis stable: Ensure both hips remain evenly grounded during the twist, avoiding one side lifting. This makes spinal twists safer and more effective.
✦Twist Posture Instructional Video
Pigeon Pose (Difficulty: 3/5)
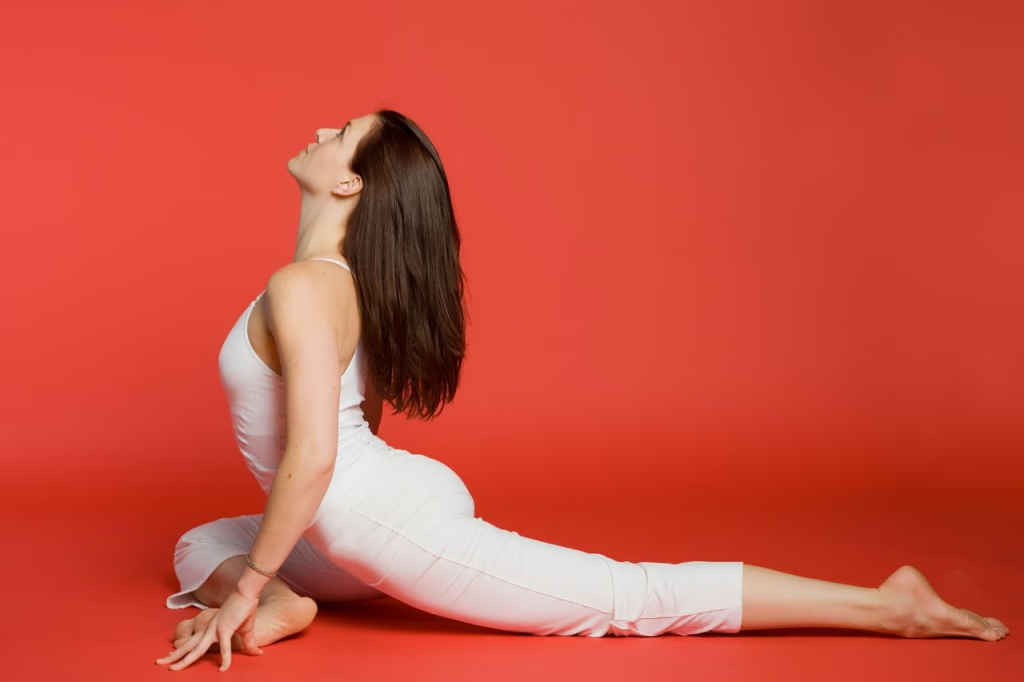
Pigeon Pose Benefits:
- Deep hip stretch, relaxes glutes and lower back, improves stiffness from prolonged sitting, releases stress
Pigeon Pose Steps:
- Starting position: Begin in an all-fours tabletop position, hands shoulder-width apart, knees aligned with hips.
- Bring your right leg forward: Bend your right knee, placing your right shin in front of your body with the knee pointing to the right side and the ankle near your left hip (adjust based on your flexibility).
- Extend your left leg back: Straighten your left leg completely behind you, top of the foot on the mat, keeping your hips (pelvis) centered without tilting to one side.
- Inhale: Lengthen your spine, using your hands to support your upper body, keeping your chest open.
- Exhale: Slowly fold your upper body forward, resting your forehead on the yoga mat if comfortable, and extend your arms forward, allowing your upper body to fully relax.
- Hold for 5-10 breaths, stabilizing your hips with each inhale and trying to sink your glutes deeper into the ground with each exhale.
- Return to tabletop and switch sides: Inhale as you slowly push up, return to the starting position, then repeat on the other side.
✦Pigeon Pose Notes
- Don't force your hips to fully touch the ground: If your hips are too tight, place a yoga block or folded towel under your glutes to reduce pressure and maintain stability.
- Avoid tilting the back leg: The back leg should extend straight back, not turn outwards. This ensures proper pelvic alignment and prevents uneven pressure.
✦Pigeon Pose Tutorial
Mermaid Pose (Difficulty 4/5)
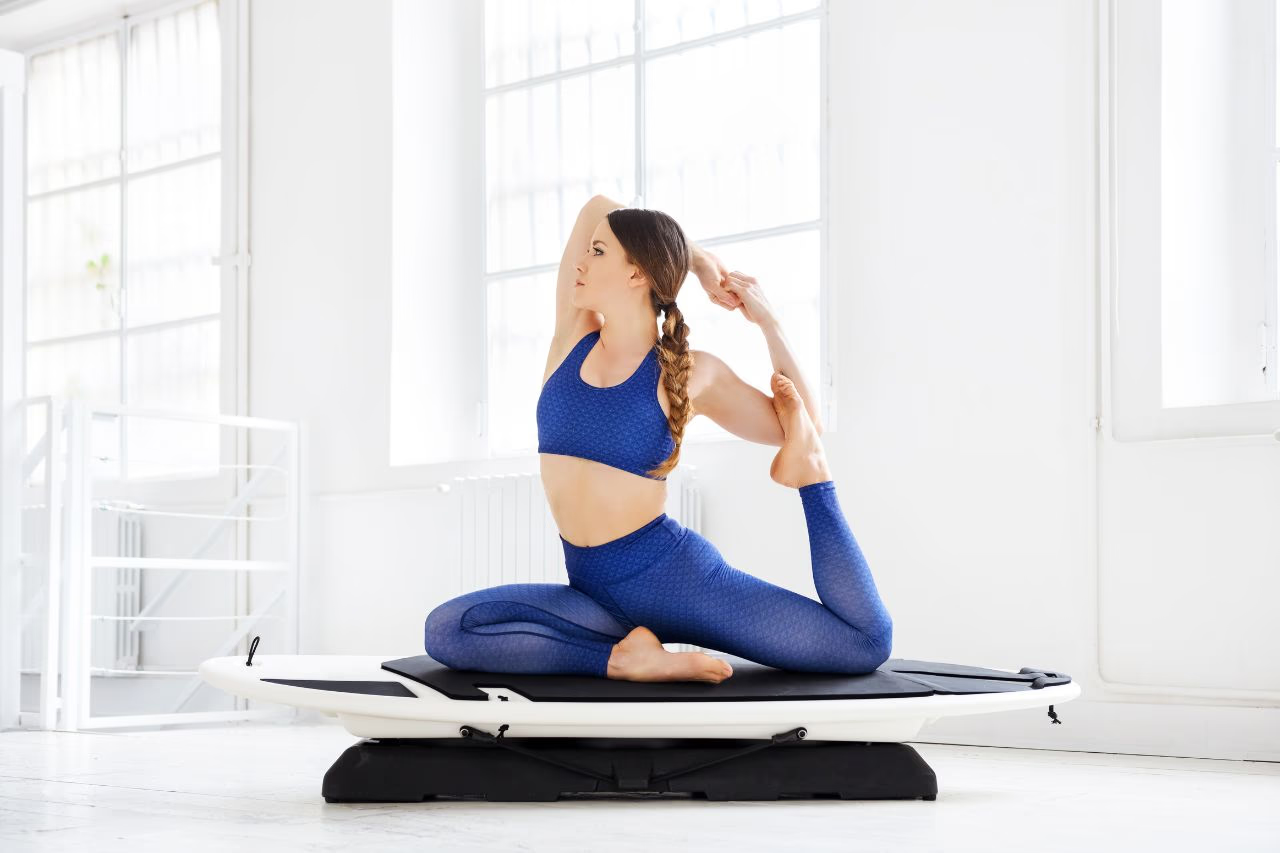
Mermaid Pose Benefits:
- Deep hip stretch, enhanced chest expansion, and relaxation of thigh muscles (tight thighs can also cause lower back pain).
Mermaid Pose Steps:
- Starting position: After finishing Pigeon Pose, do not immediately bring your leg back.
- Bend the extended leg (the back leg) and grasp it with the hand on the same side (e.g., left hand for left leg).
- With each exhale, gently press your calf towards your thigh, but do not overstretch.
- Hold for 5-10 breaths, feeling the chest expansion and the stretch in the front of your thigh.
- To finish, slowly release your arm and leg, return to an all-fours position, then switch sides and repeat.
✦Mermaid Pose Precautions
- Leg flexibility adjustment: If your back leg doesn't bend easily, stay in Pigeon Pose first. Gradually improve flexibility before attempting Mermaid Pose.
- Hand variations: If your shoulders and arms are tight, try holding your ankle with one hand, or resting your elbow against your ankle, then gradually progress to the two-handed Mermaid grip.
- Avoid excessive lower back pressure: Don't over-arch your back. Focus on core stability and spinal extension, rather than an exaggerated arch.
- Ensure central hip alignment: Avoid tilting your body to the side. Keep your hips (pelvis) stable and evenly weighted.
✦Mermaid-Style Instruction Videos
Camel Pose (Difficulty 3/5)
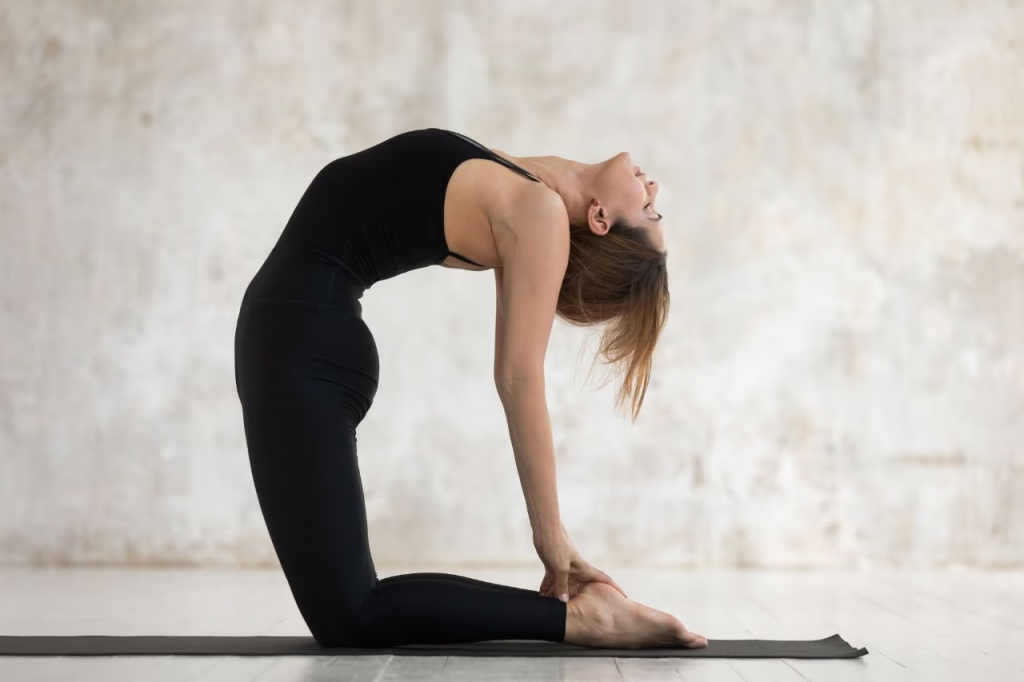
Camel Pose Benefits:
- Relieves shoulder and neck tension, soothes lower back pain, opens airways, and improves rounded shoulders and hunchback posture.
Camel Pose Steps:
- Begin in a high kneeling position with your legs hip-width apart and parallel to your yoga mat. Place your hands on your lower back, ready to begin.
- Inhale, engage your core muscles, squeeze your shoulder blades together, and open your chest.
- Exhale, slowly lean your body backward to further open your chest. Lower your hands to rest on your heels, and gently tilt your head back. Hold for 5 breaths.
✦Camel Pose: Things to Know
- Beginners don't need to rush into arching their neck back. If your body feels tight, simply keep your hands on your hips and gaze diagonally upwards.
- The beginning and end of this basic yoga pose must be done slowly. Stop at an angle where you can breathe steadily, and never rush to bend further back, as this can lead to injury.
✦Camel Pose Tutorial Video
Child's Pose (Difficulty 1/5)
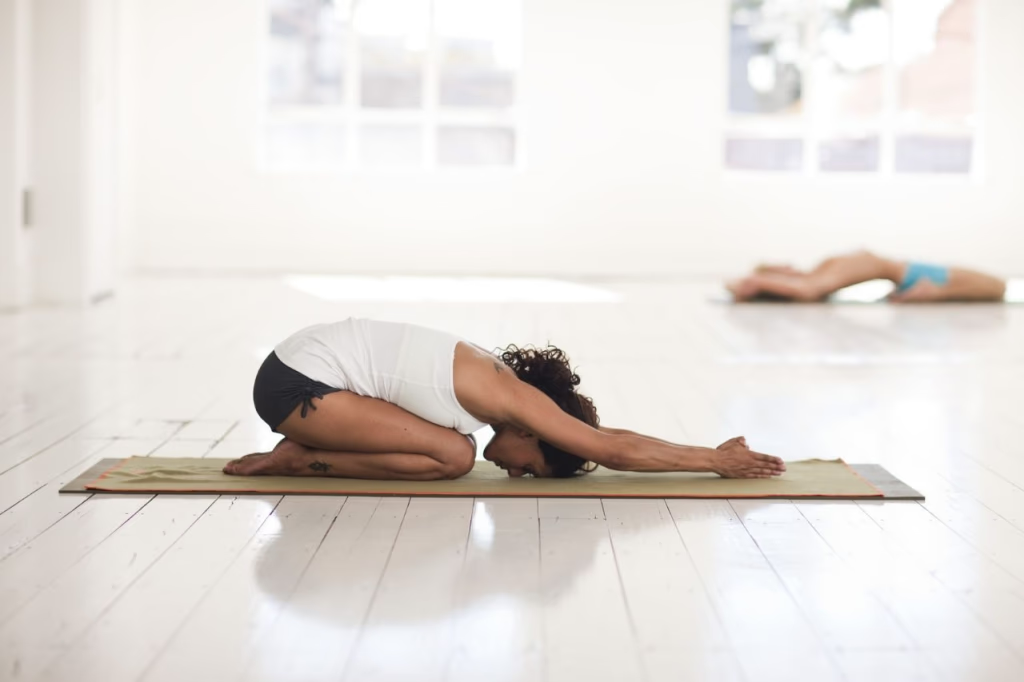
Child's Pose Benefits:
- Relieves lower back tension, aids digestion and gas relief, improves insomnia, and eases menstrual cramps.
Child's Pose Steps:
- Kneel on your mat with knees slightly apart and big toes touching.
- Walk your hands forward on the mat until your forehead touches the floor and your chest rests on your thighs. Hold for 5 breaths.
- With each inhale, imagine drawing breath into your lower back. With each exhale, imagine your torso sinking deeper into the floor.
✦Infant Pose Considerations
- Many people with tight muscles initially can't sit back on their heels or touch their forehead to the ground. If this is the case, we recommend using a yoga block or folded blanket under your hips or forehead to assist with the practice.
- This basic yoga pose is often used as a cool-down after exercise, so we recommend practicing it last, after completing the other poses.
✦Baby Pose Instructional Video
Final Thoughts
This beginner's guide to basic yoga poses from Twosevenths features 13 easy-to-master poses perfect for beginners. For those who spend long hours hunched over phones or computers, these fundamental yoga movements are highly effective at relieving back and neck pain. They're also beginner-friendly, so you can practice them at home with just a yoga mat. Get up and start moving now!
If you prefer professional guidance from a yoga instructor, you can also attend in-person yoga classes: Taipei Yoga Recommendations, Hsinchu Yoga Recommendations, Taichung Yoga Recommendations, Tainan Yoga Recommendations, Kaohsiung Yoga Recommendations. For more yoga resources, check out: Benefits of Yoga Guide, Recommended Yoga Pants Brands.
Don't miss these either
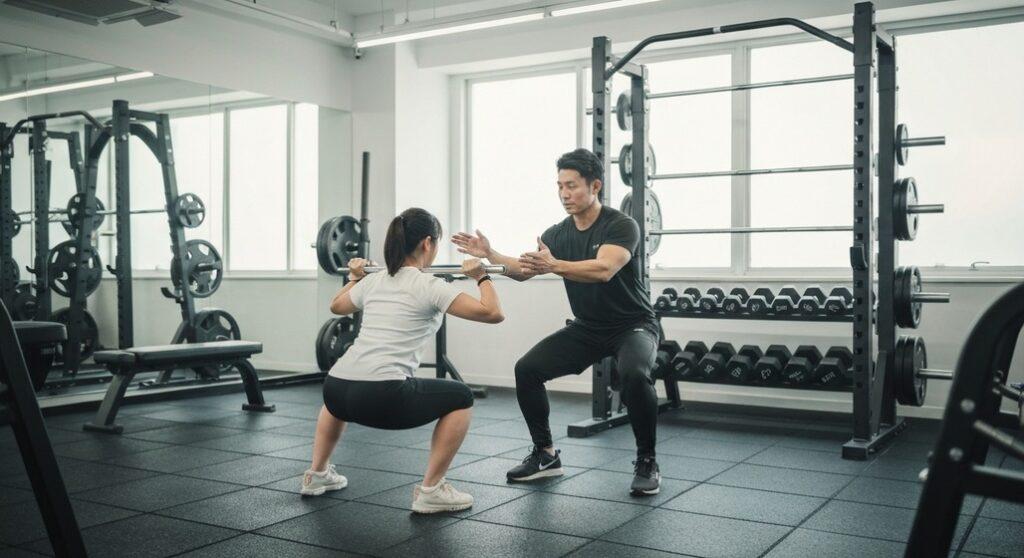
Kaohsiung Private Personal Trainers: Real Experiences to Help You Choose the Right Coach! | 4 Kaohsiung Personal Training Studios Reviewed

Taichung Indoor Golf Recommendations|Play World-Famous Courses Without Leaving Taiwan! 3 Indoor Golf Driving Ranges Reviewed
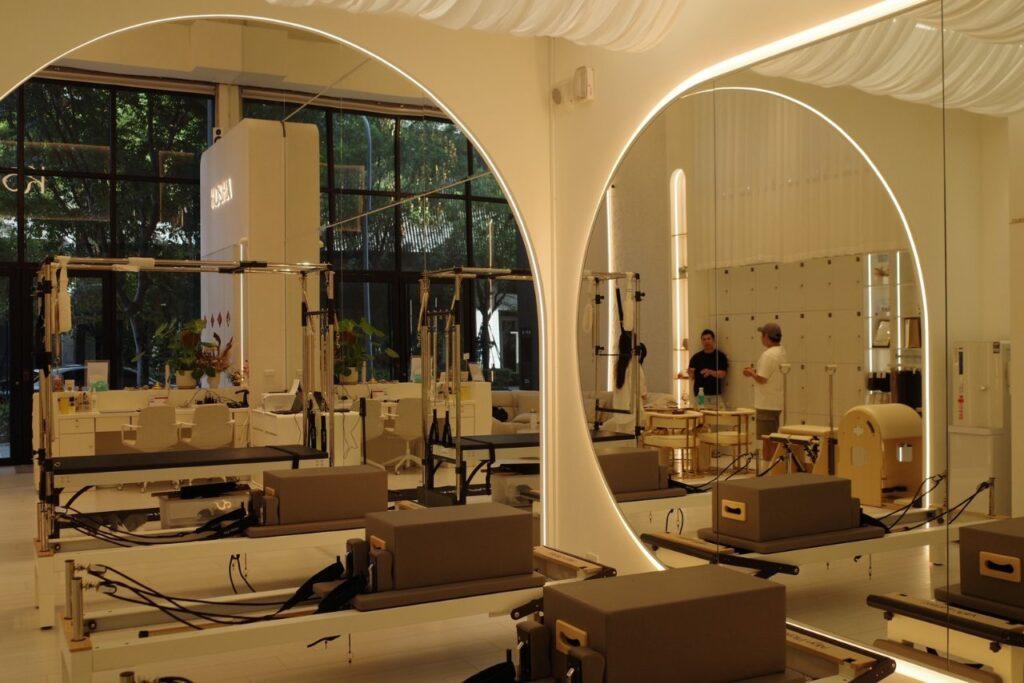
KOSHA Pilates Review|Hsinchu East District: Full-Equipment Pilates with AI Posture Analysis for Precise Training

Reader Comments
No comments yet — be the first to share your thoughts.